
Tataki-zomé - how to make prints from nature
If the paintings in the Lady Lever Art Gallery have inspired you to get creative, but you don’t feel confident drawng, then don’t worry - help is at hand. Artist Angelica Vanasse has a more direct method of making art that celebrates the magic of flowers and plants. Intrigued? Let her explain how to do it!
Thinking about the recent Flower Fairies exhibition has inspired me to share one of my favourite ways to gather colours from nature - tataki-zomé.
Tataki-zomé is also known as ‘flower pounding’ or ‘plant bashing.’ This process uses plants to create a print onto material like fabric or thick paper. It has been used by artists from Japan for many years and is now something that artists around the world have explored in their own ways. Tataki is the Japanese word for hammering, and zomé is the word for dye. Some people also call this hapa-zome, which means plant dye.
With this process you are using the colours in plants themselves to dye the materials by hammering, so you are actually bashing the colour out of the plants onto the fabric or paper. It’s an excellent process to experiment with and when you pull back the paper or cloth to see what you’ve made there’s an exciting reveal. A bit like nature’s Polaroid!
Tips for getting started
When you’re looking for plants to use, consider garden or plant pot trimmings or waste from a local florist, or even a bouquet past its peak. If you’re foraging in nature, do so responsibly - pick from different plants in areas of abundance. If you only see one or a few of something, it’s better to leave it to have a chance to grow and thrive. If you can use leaves, petals and plant matter that you find on the ground instead of picking even better! Make sure you can identify the plants you are working with and avoid any that are poisonous or might cause allergic reactions. When you’re selecting your fabric or paper to print onto, consider recycling something you already have or using paper or fabric scraps.
Here’s how you do it…
Gather your materials
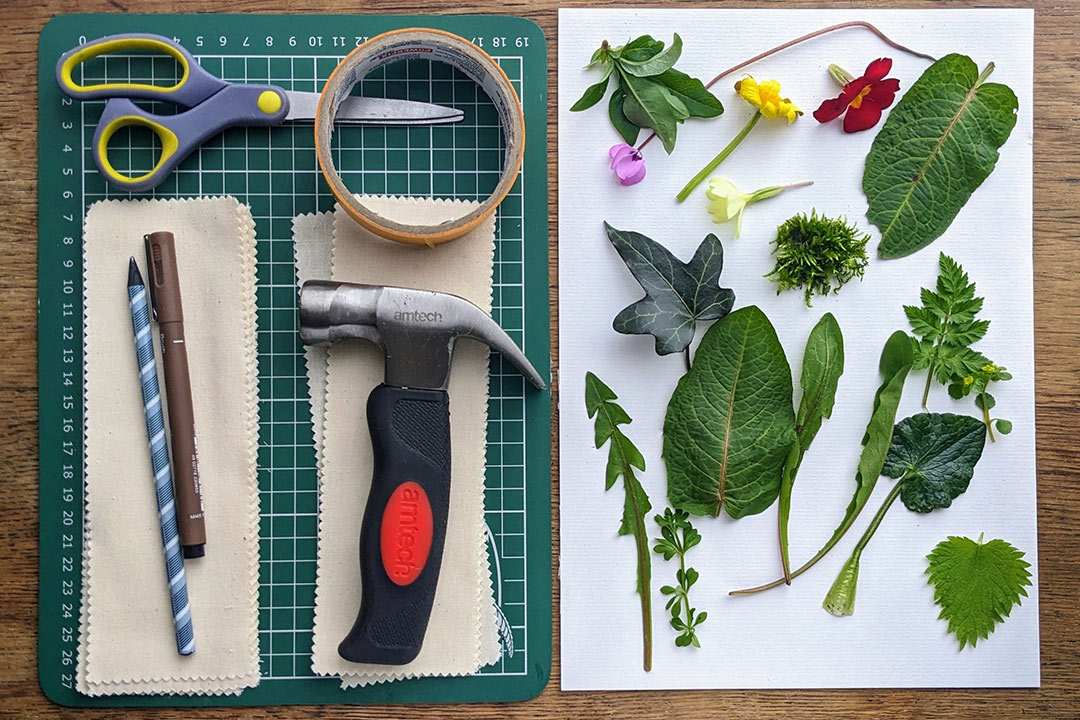
You will need the following
- Something to do the bashing with - I prefer a ‘stubby hammer’ which is a hammer with a shorter handle than usual, but any sort of hammer, mallet or even a rock will work.
- Something to print onto - fabric works well, as does heavy paper (like watercolour or handmade paper). For ease I’ve chosen pre-cut muslin cloth strips which are actually sold for waxing.
- Plant matter to print with - petals and leaves work best but experimenting is fun! You could try berries, soil, moss or even bark.
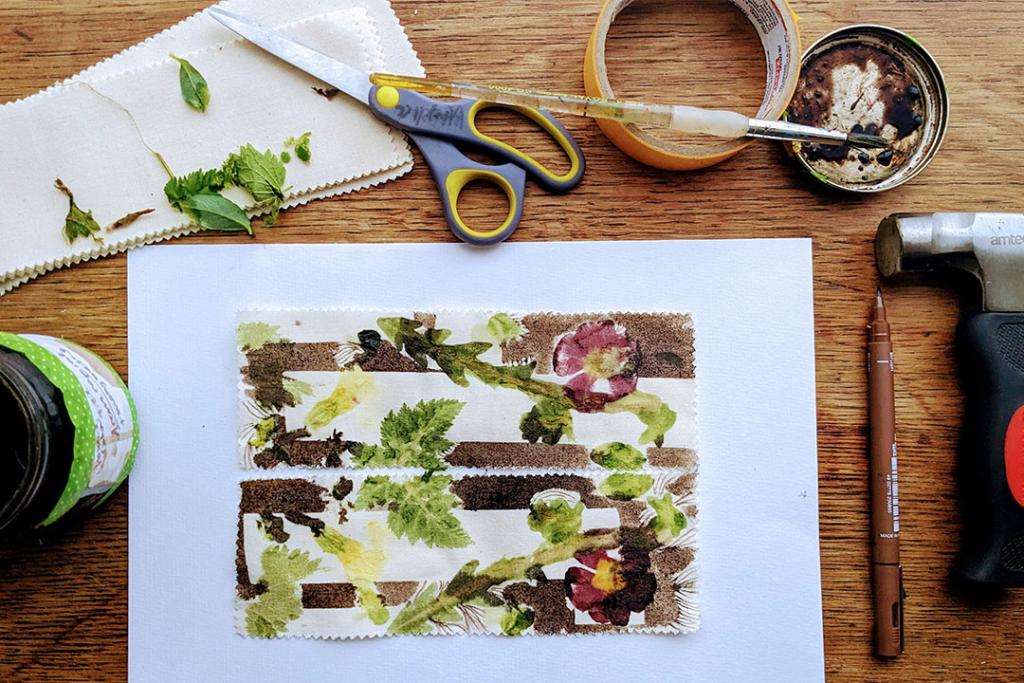
Other useful tools include masking tape, scissors, a cutting mat or large board, pens, pencils and a notebook. You might even want to add some inks or paints into the mix later on in the process.
Step 1 - find a workspace
Find a sturdy surface that can handle some hammering and plant bashing! I’ve found that surfaces like outdoor wooden picnic tables, cut off tree stumps and benches are often sturdy enough but have a softness that absorbs the shock of the hammering. A cutting mat or wooden board on a sturdy table (or the floor) would also work. You might notice that the surface you hammer onto adds a bit of texture and pattern to your prints themselves.
Step 2 - composition
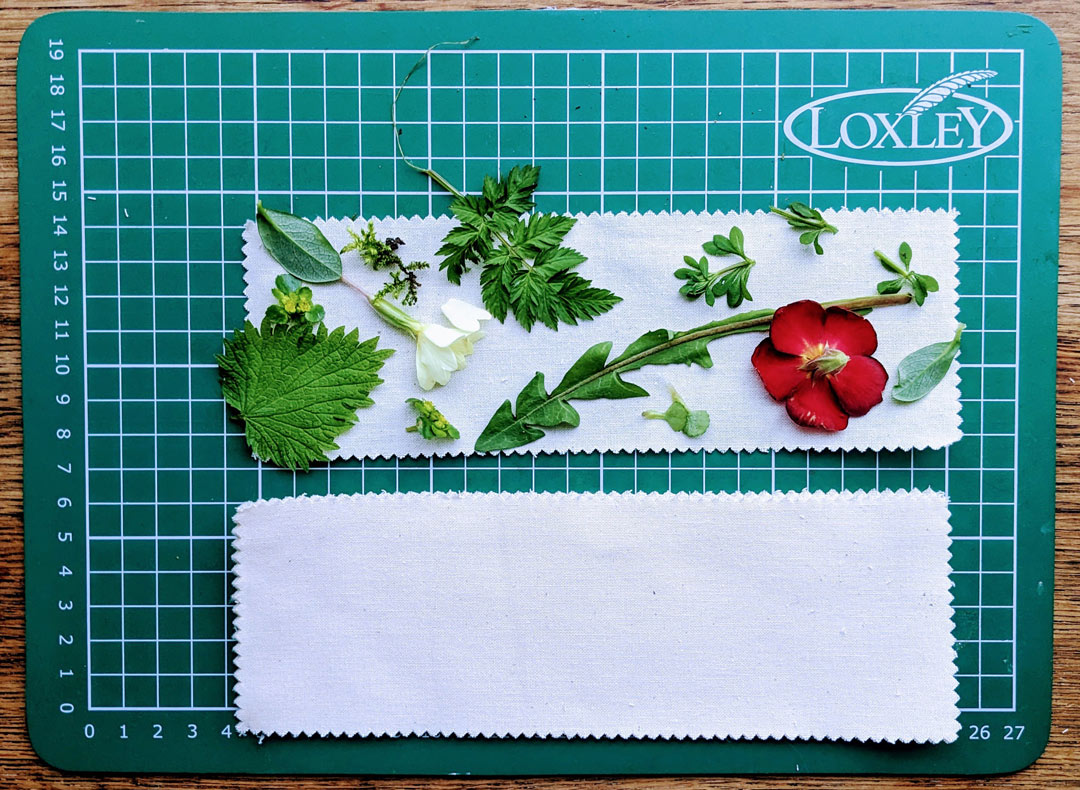
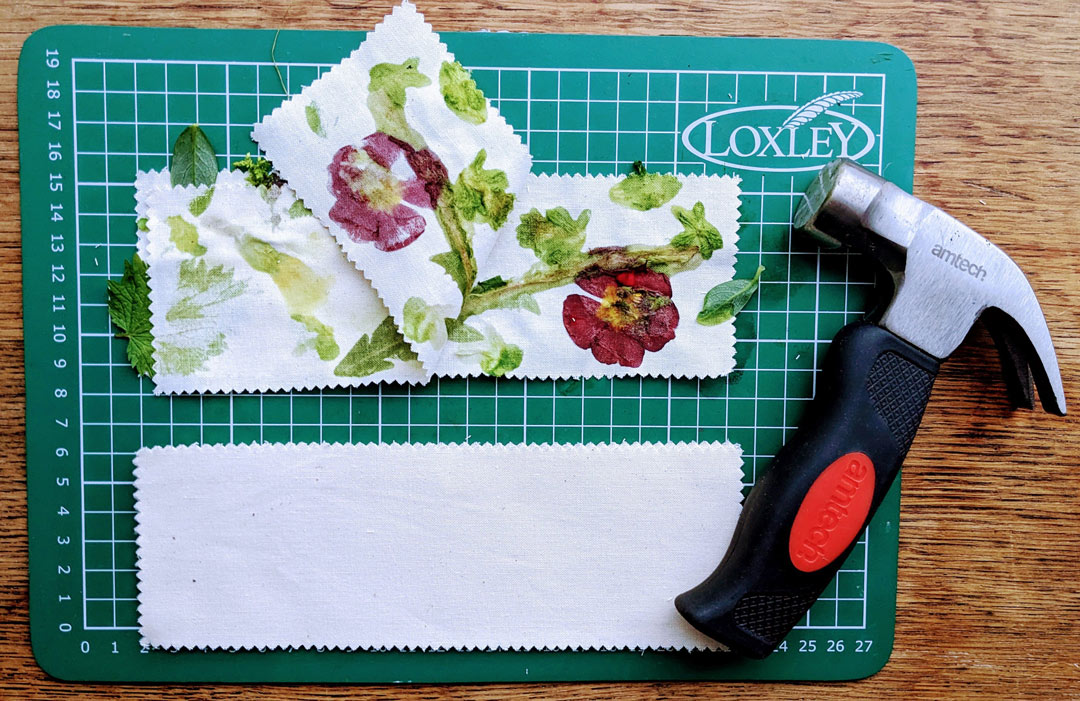
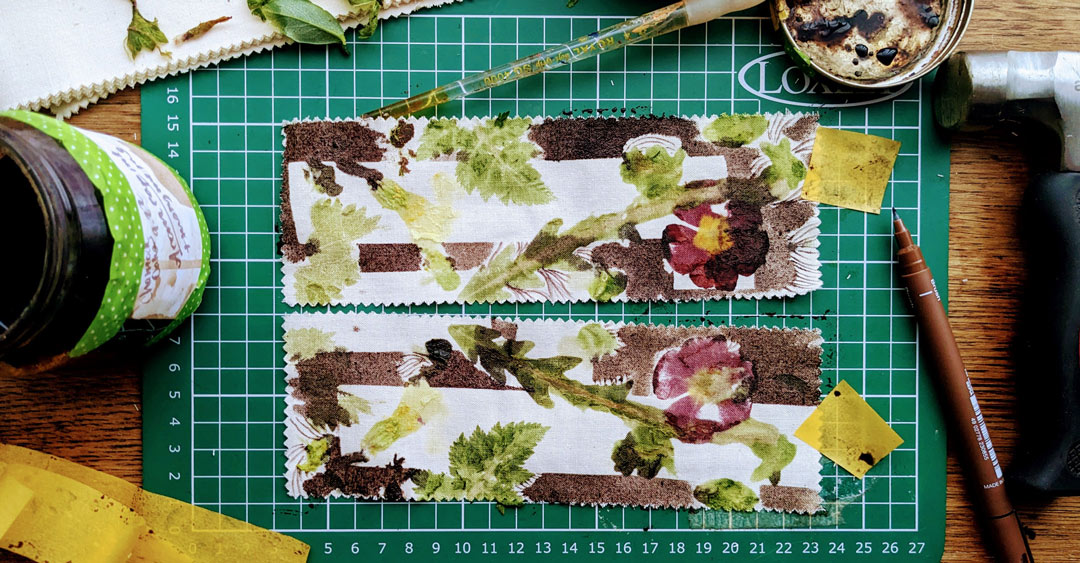
Create your composition - this will be unique for each print! First place down your base piece of fabric or paper, then arrange your plant matter on top of it. It’s okay for things to go off the edges, although only what’s on the fabric or paper will print.
Step 3 - cover up

Cover the plant matter with another piece of fabric or paper, sandwiching the plant matter in between. I like this technique as it gives you two prints. You could also use fabric on one side and paper on the other. The main thing is to have something between the plants and the hammer.
Step 4 - hammering
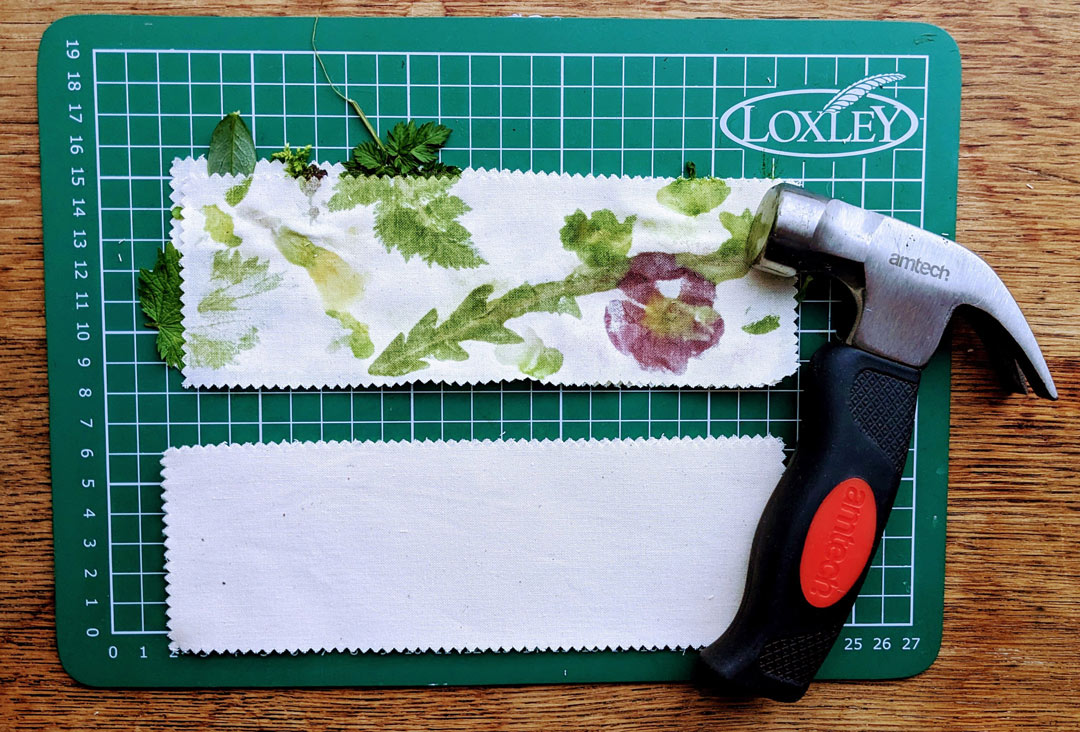
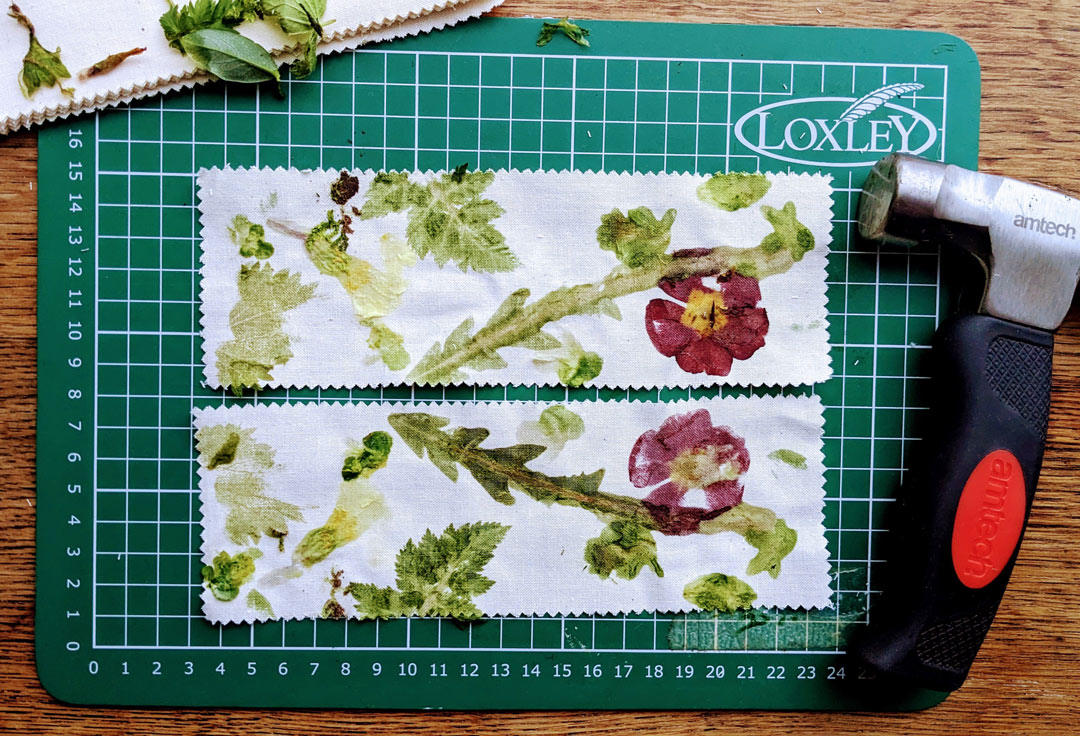
Carefully hold the fabric in place with one hand (or ask a friend to help with this) while you gently but firmly hammer the fabric to crush the plants underneath. If the surface allows you could also try taping the fabric so stop it from wiggling around. You’ll start to see some colours come through the fabric on top. Keep hammering until you’ve worked across the whole surface.
Step 5 - the reveal!
Peel off the top layer and see what has been created. You might notice a difference between the top and bottom prints as some leaves and plants print better from one side than the other. Some plant matter might be stuck to your fabric or paper, which you can peel off or leave in place. Add your plant scraps to your compost or return them to nature.
Step 6 - discoveries
Examine what you made. What worked well with your print? What might you try differently next time? Can you smell any of the plants? If you use herbs you certainly will notice a scent! Some plants work better than others and as you play with this process you’ll make lots of discoveries.
The prints will dry quite quickly and you can press them under a few heavy books as they dry so they stay flat. The colours will change as the prints age, and they’ll keep best if you avoid placing them in direct sunlight. Washing the fabric can rinse away your print although you could explore the world of natural plant dyes and mordants to find ways to set your prints onto fabric more permanently.
Taking it a bit further…
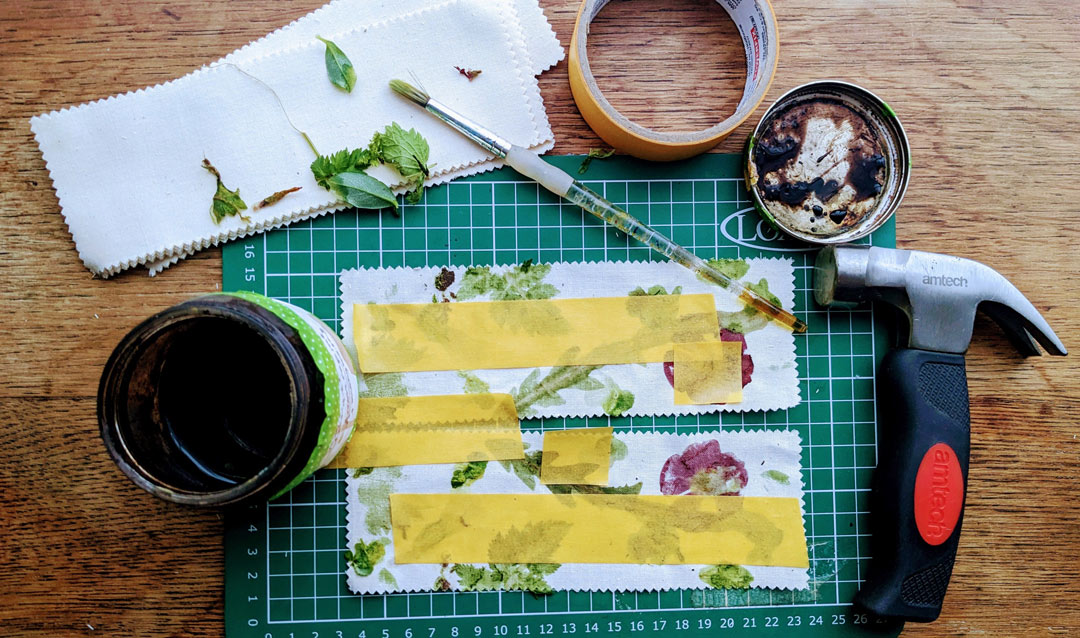
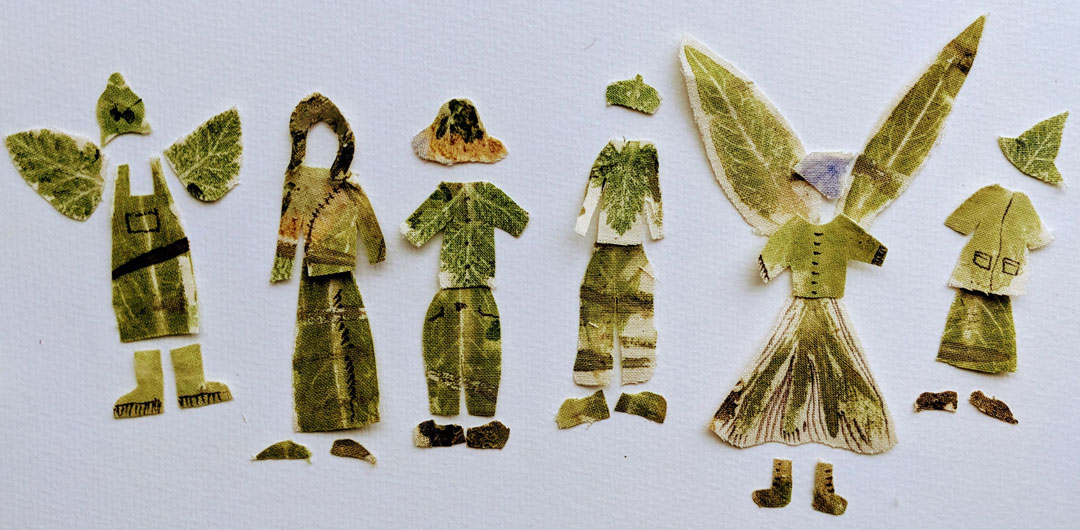
From here you can enjoy your prints as they are, or find other ways to work into them. You can try drawing or painting onto the fabric, masking off areas with tape and applying an ink wash, or cutting up and collaging.
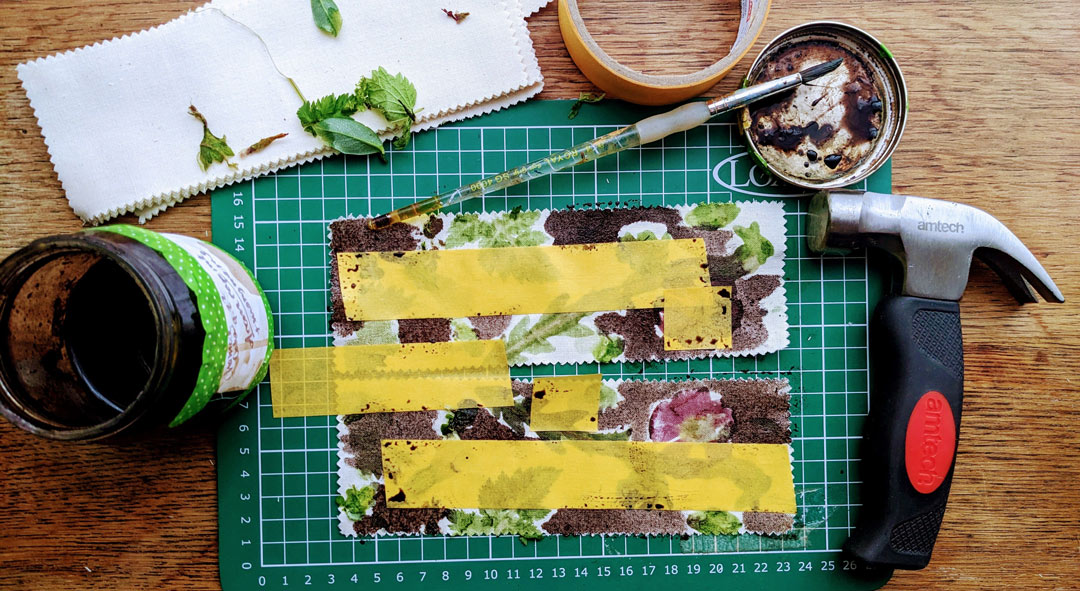
I used some acorn cap ink that I made in the photo above, you can see how it looked on the finished print when the masking tape was removed below.
The possibilities are vast so enjoy the process and see what you can make. I felt inspired by the recent Flower Fairies exhibition at the Lady Lever Art Gallery to cut out some fairy-sized clothing to make mini outfits fit for very small friends. What will you make?
All images courtesy of Angelica Vanasse